Follow the Below Steps to configure the deconsolidation process during the Putaway Process.
Before you start the configuration for your EWM Warehouse using this blog, we would advise you to activate the BC set /SCWM/DECONS using Tcode SCPR20 for standard warehouse 0001 to have basic configurations ready for copying.
Also, please make sure you also maintain below WPTs, Storage types, and Bins in advance.
WPT — 3060, 3065, and 3070 (Refer to this BLOG)
Storage Type — 9010, 8010, and 9030 (Refer to this BLOG)
Storage Bin — GR-Zone (9010 Storage Type) and DEKO-BIN (8010 Storage Type) use tcode /SCWM/LS01
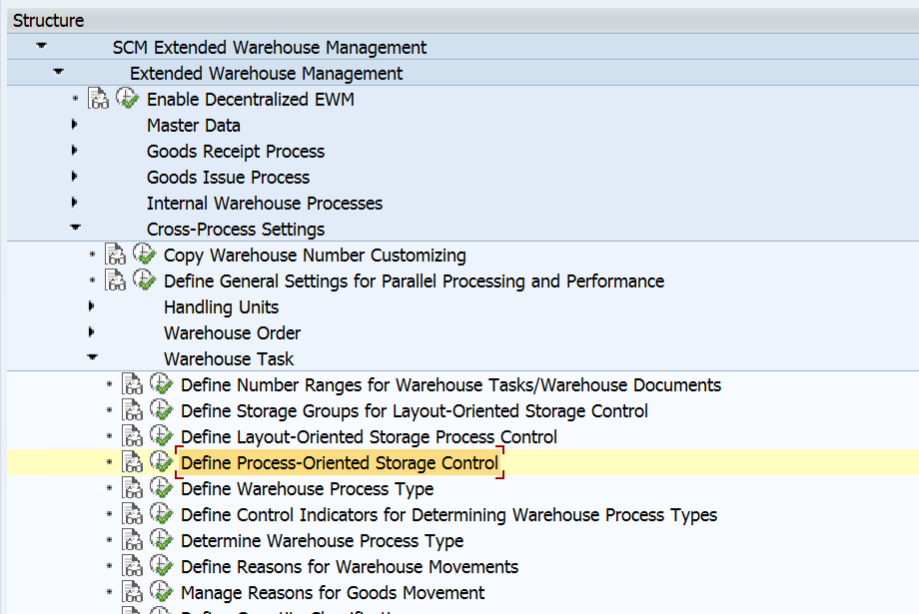
Part 1: First we need to create a POSC for our warehouse to perform deconsolidation during the Putaway Process.
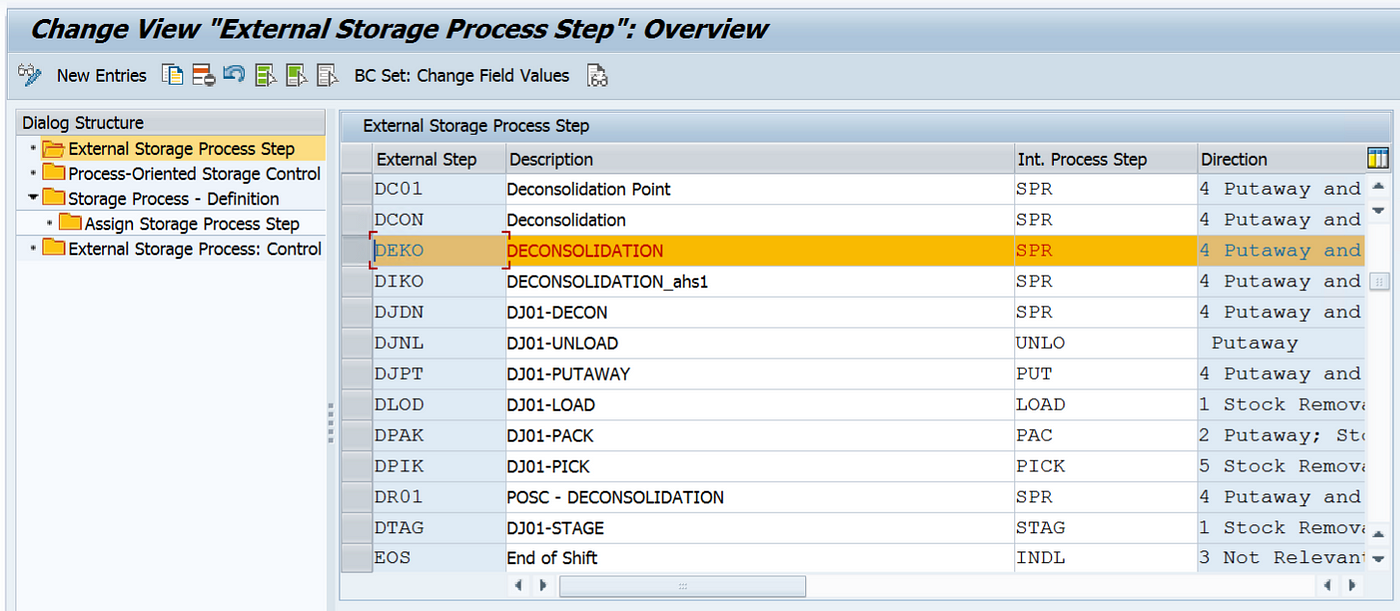
We need to create an external step for Deconsolidation and assign Internal Step SPR which stands for deconsolidation so that we use it as one of the steps in our POSC. Similarly, we need to maintain external steps for Unloading and Putaway which will be needed to create POSC.
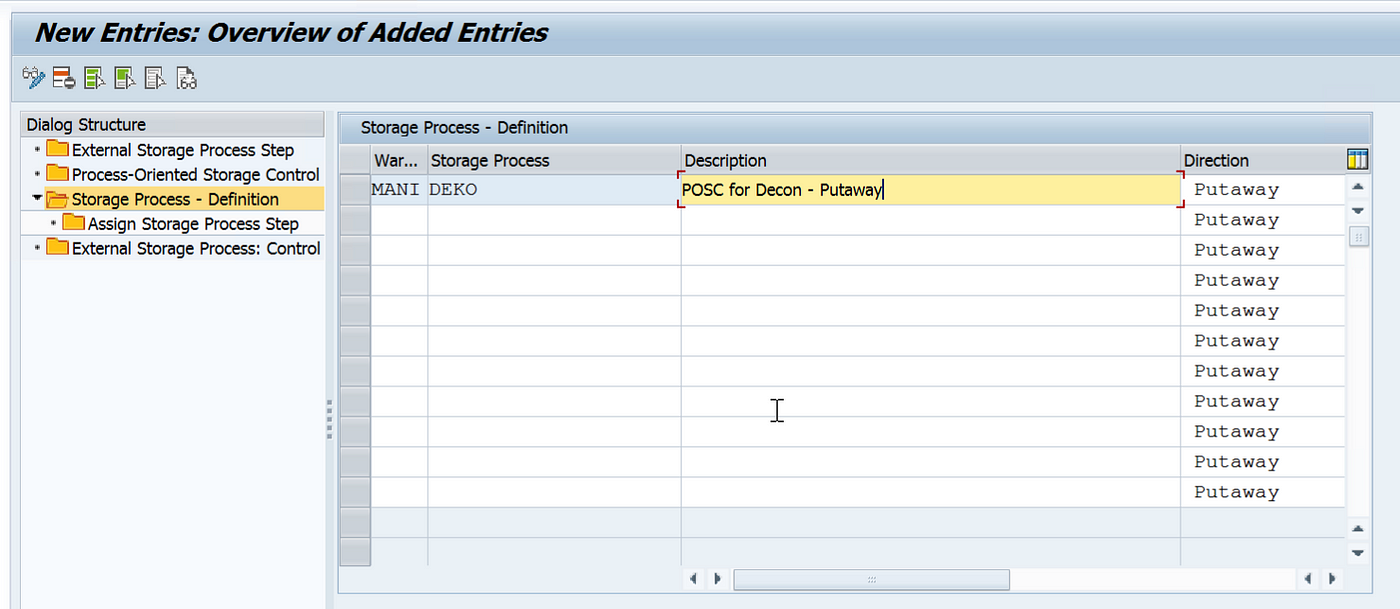
Now we need to create a Storage Process Indicator and assign the direction on whether POSC will be used for Inbound, Outbound, or Internal Transfers.
In the DEKO Storage Control, we have assigned Three External Steps: IB01 — for Unloading, DEKO for Deconsolidation, and IB03 for Final Putaway. We have Auto WT creation for the Unloading and Deconsolidation Process and have selected HU Task for Unloading.
For the Putaway Process, we can assign the below steps in the same sequence only.
- Unload
- Count
- Deconsolidation
- Quality Inspection
- Perform VAS
- Putaway
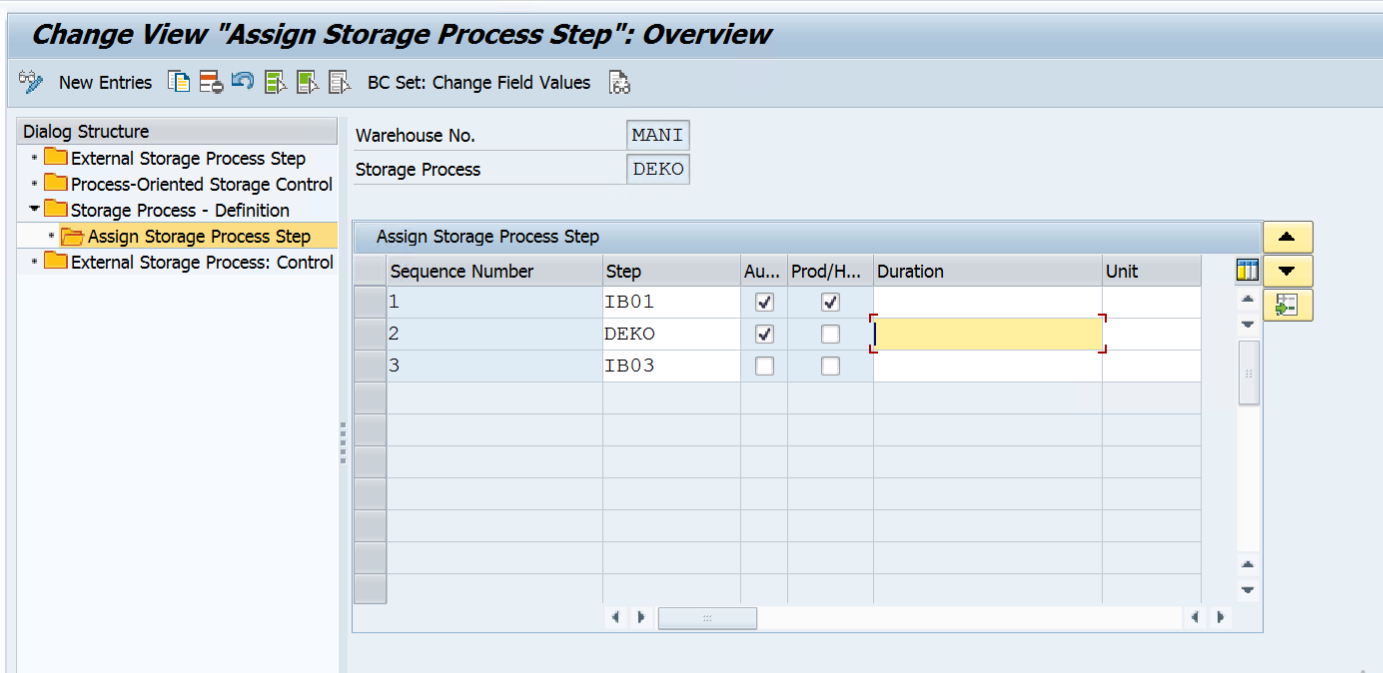
We have selected Auto WT for the first 2 steps which means on successful confirmation of the WT, the system will create WT for the next step automatically. We have selected Create Product/HU WT which means it will simultaneously create Putway WT.
Now we need to assign the below controls at the External Step level.
- Source Storage Type
- HU Type Group: In case we need to specify different data for a specific kind of HU Type/Group.
- WPT — To move the stock from the source storage type to the Destination Storage Type
- Intermediate Storage Type and Section — Specify a staging area or work center
- Intermediate Storage Bin — if the WPT has a WT generic indicator or there is no rule-based indicator selected, it is advised to provide a Bin so that stock will be moved to this bin for deconsolidation or any other activity.

As you can see we also need to maintain the destination storage type 8010 and Storage Bin DEKO-MANI for our external step DEKO. We will have to maintain a storage type with role “E (Work Center)” and bin in the same storage type using Tcode: /SCWM/LS01. Similarly maintain the storage type and Bins for other steps as well if not already maintained.
Also, make sure to create WPT 3060 for our Deconsolidation Step, we can copy the standard WPT 3060 which is available for WH 0001. Similarly create WPTs 3065 and 3070 for other external steps IB01 and IB03 if not already created.
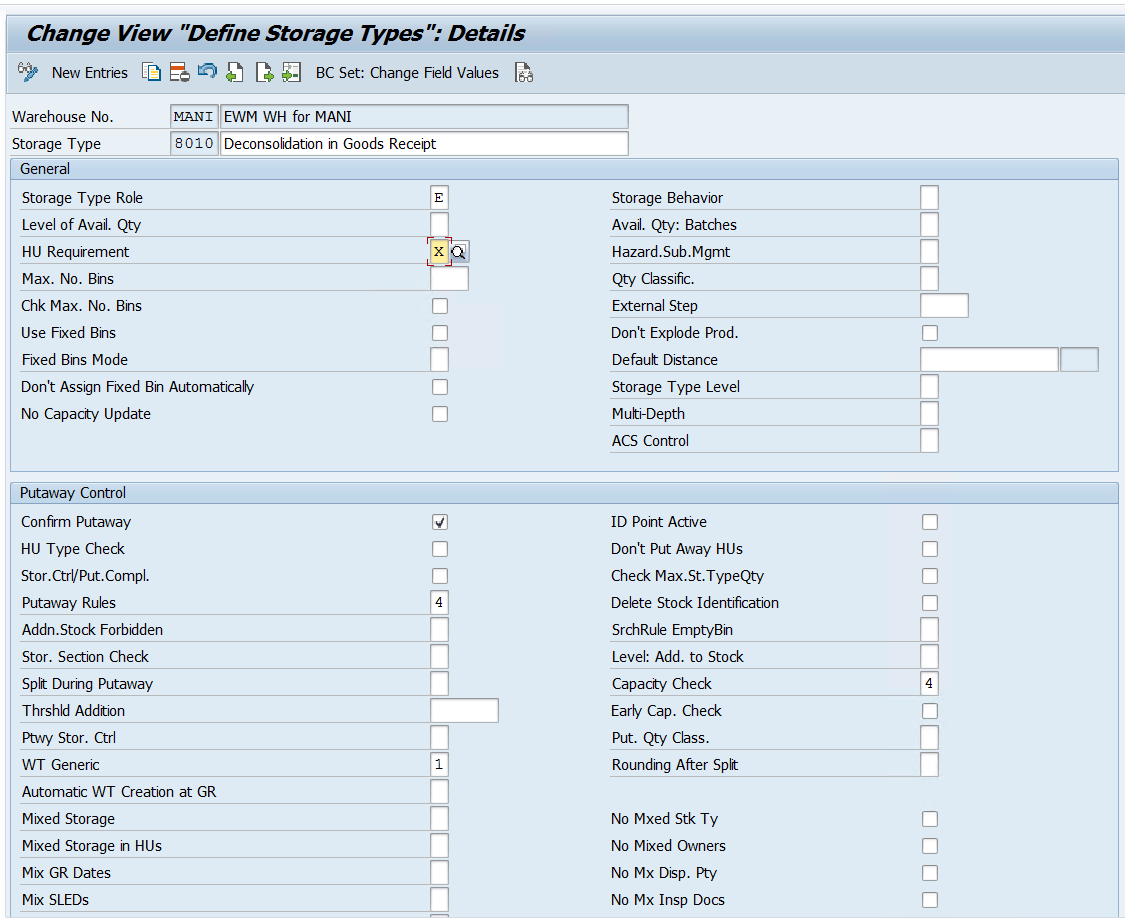
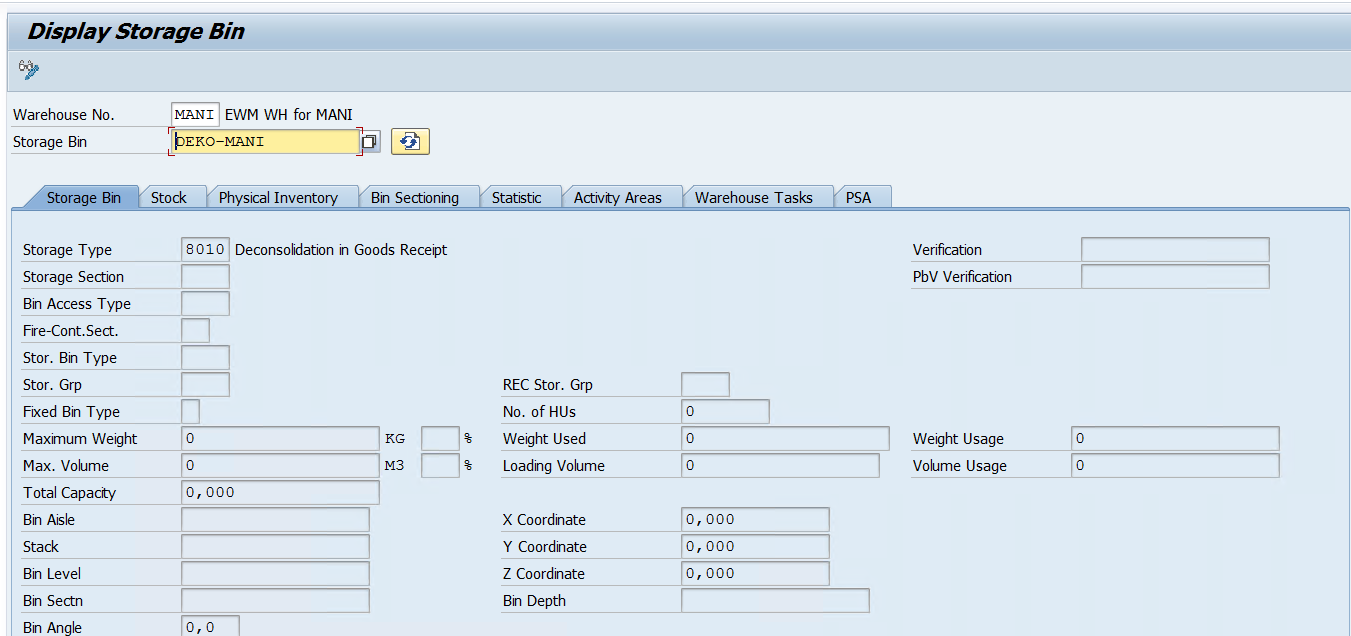
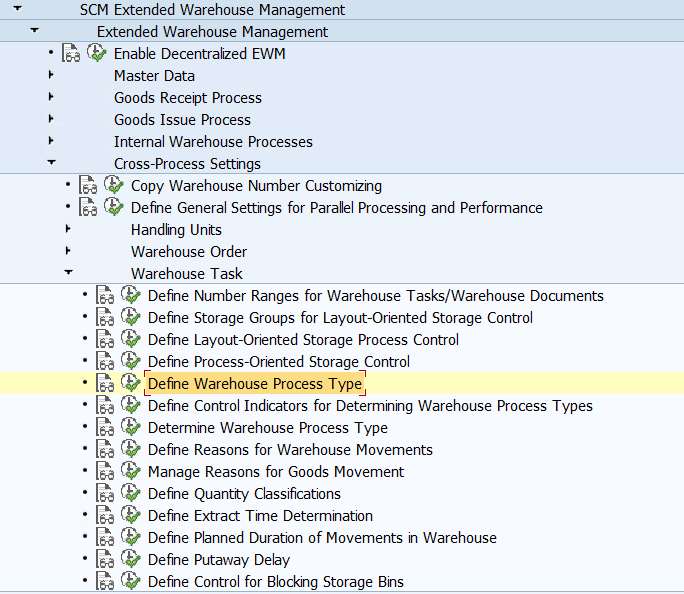
Part 2: Now we need to set up a WPT for our deconsolidation process and configure WPT determination.
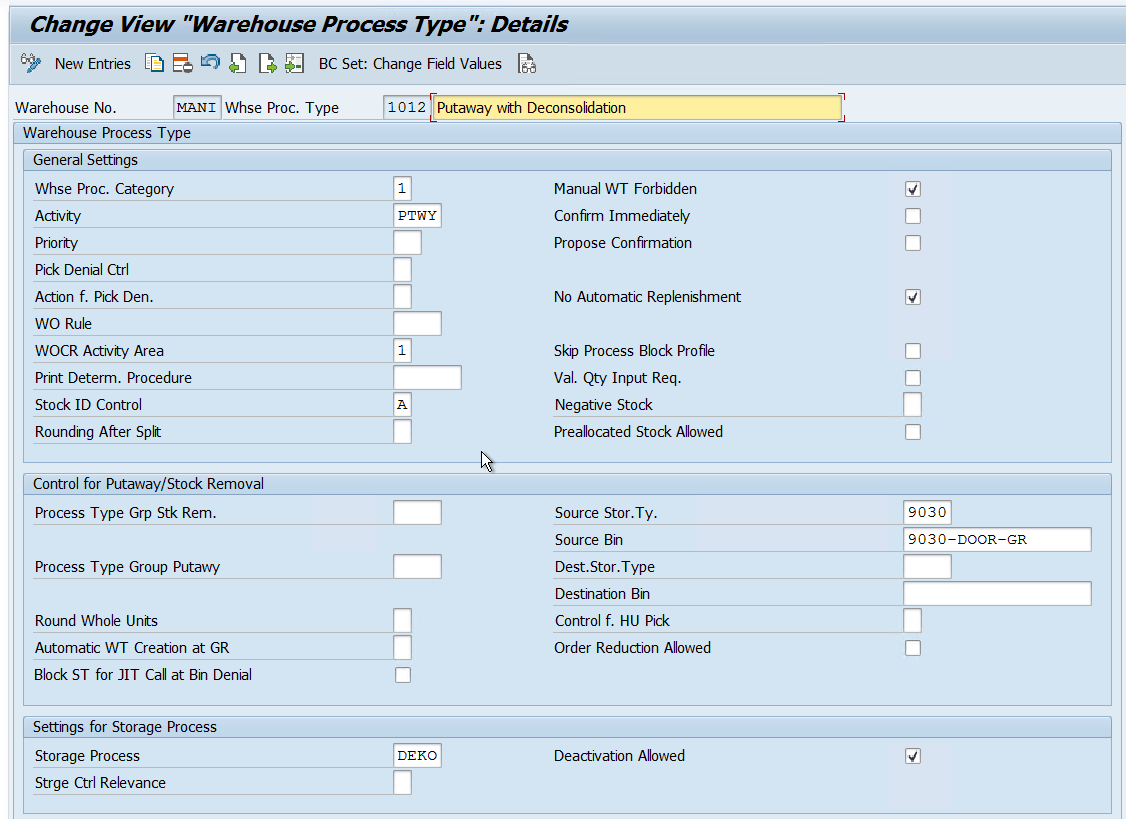
We have created WPT 1012 for the Deconsolidation Process during Putaway in our Warehouse MANI. We have also assigned the POSC to the WPT.
Now we will create a Control Indicator for our WPT

Now we will maintain determination settings for our newly created WPT 1012. We can determine WPT based on the below parameters.
- The Document Type (IBD Type)
- The Item Type (Item Type for IBD)
- The Delivery Priority
- The Control Indicator (DK — we created for our WPT 1012)
- Process Indicator

The WPT determination indicator DK which we created for our 1012 WPT needs to be assigned to the Product master in Whse Data view so that the system can correctly identify the WPT during Inbound Processing.
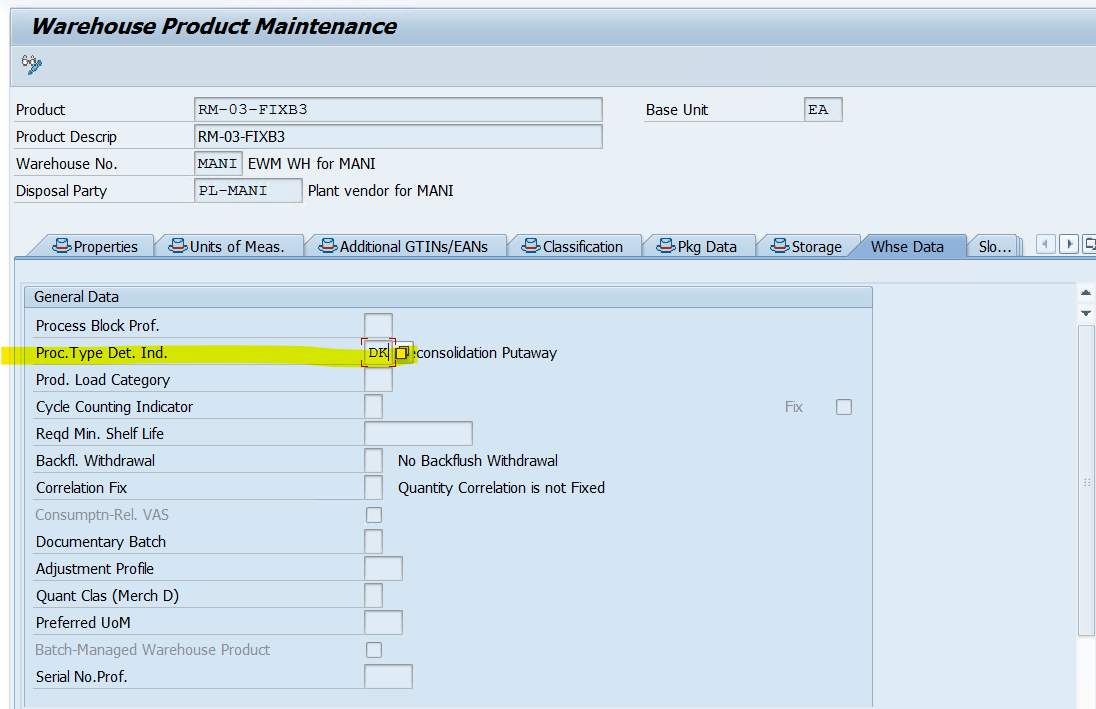
Part 3: After setting up the POSC and WPT for the deconsolidation Process. We will maintain Activity Area-related configuration.
we will use the below nodes to maintain the activity area for our deconsolidation work center (Storage Type)
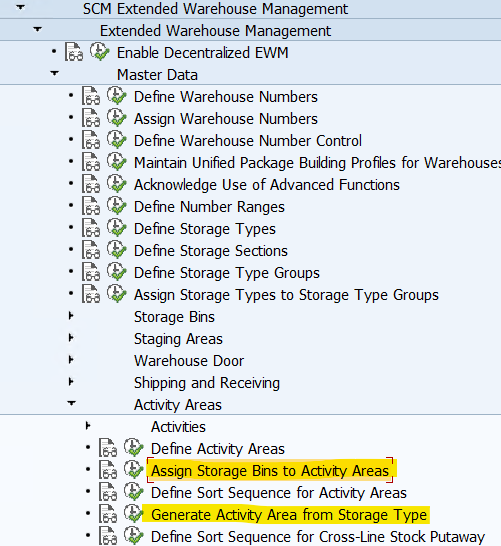

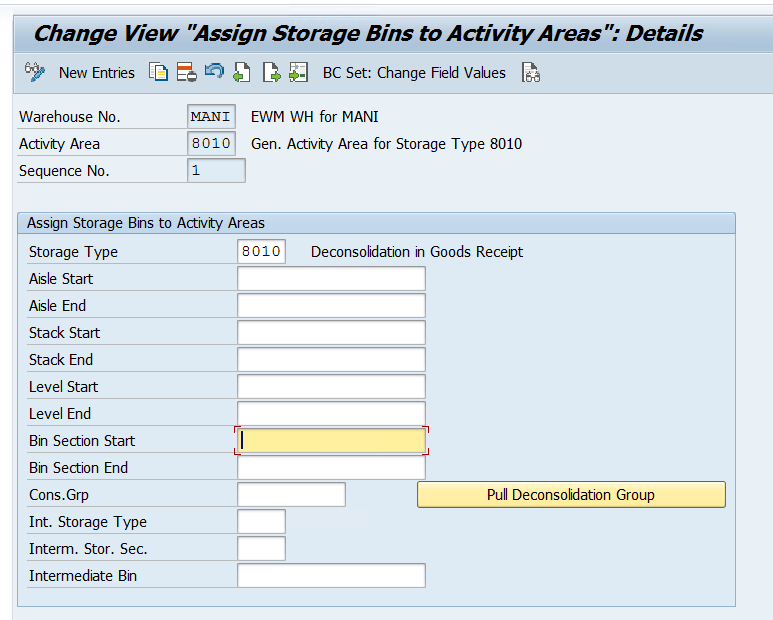
Part 4: After setting up the Activity Area, we need to maintain the work center-related configuration.
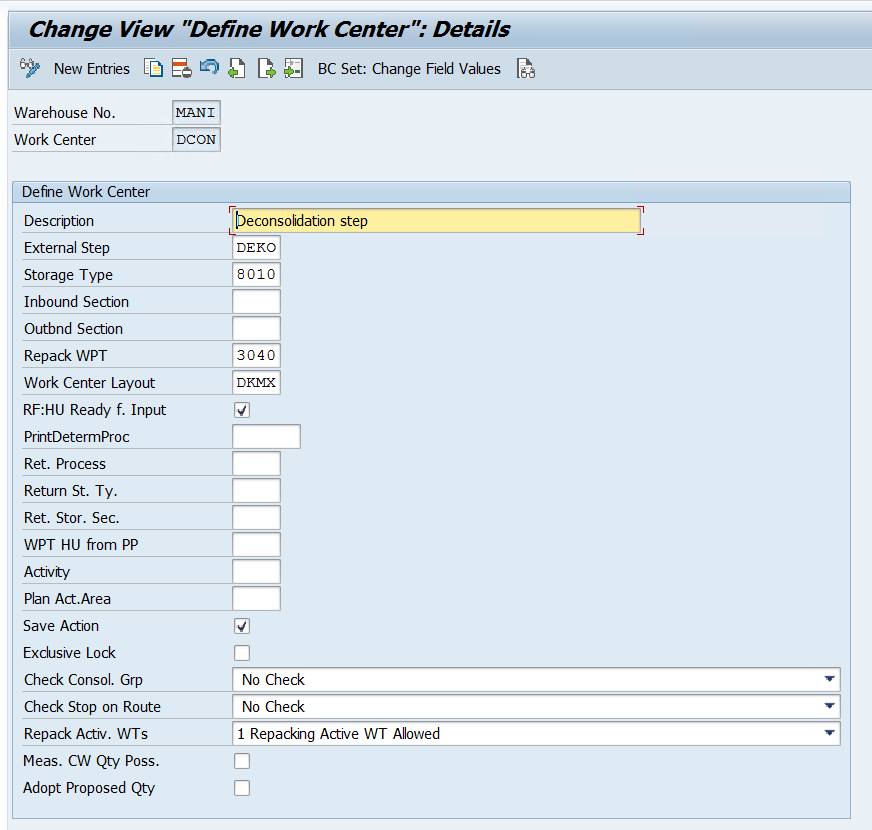
We just need to create a work center layout and define a work center that will act as a location within our warehouse where deconsolidation takes place.
We have copied a standard work center for deconsolidation and created the DKMX layout for our work center.
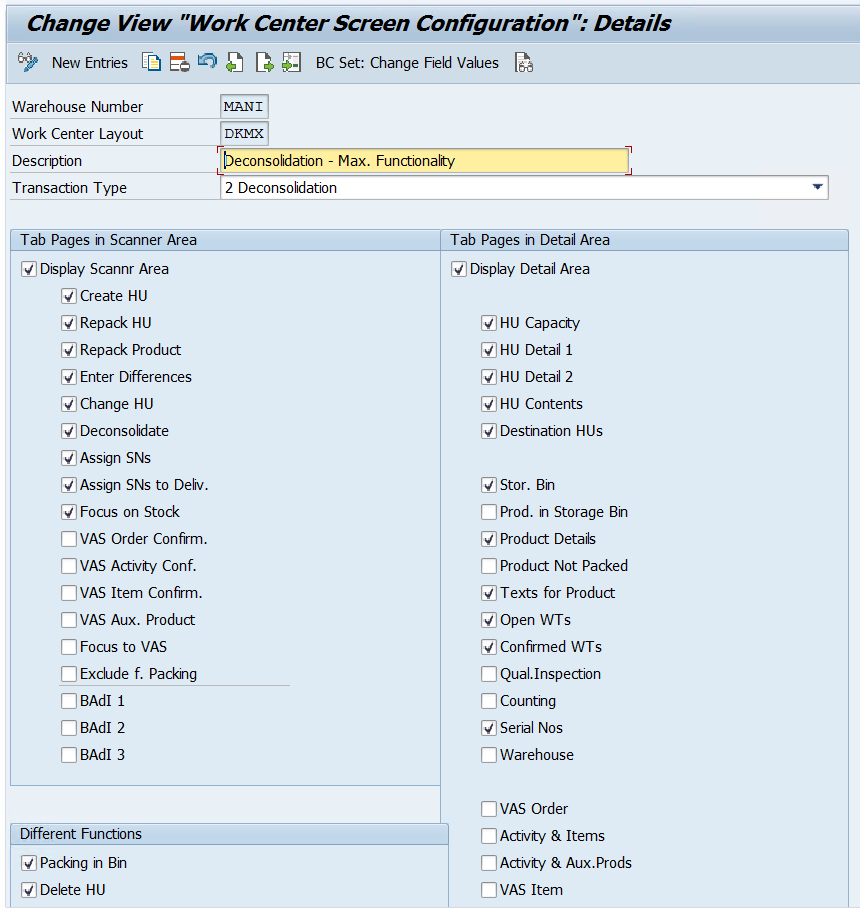
While defining the work center we have below options to maintain.
- Inbound and Outbound Section
- External process step: Mandatory to maintain the external step if we are using this work center in a POSC
- Repacking WPT
- Print Determination Procedure for printing
- Return Storage type and Section to move the surplus stock if the work center is used as a pick point.
- Storage Type: We can use a storage type with role E- Work Center, B- Pick Point, I- Work Center in Staging areas group, or C- Identification and Pick point.
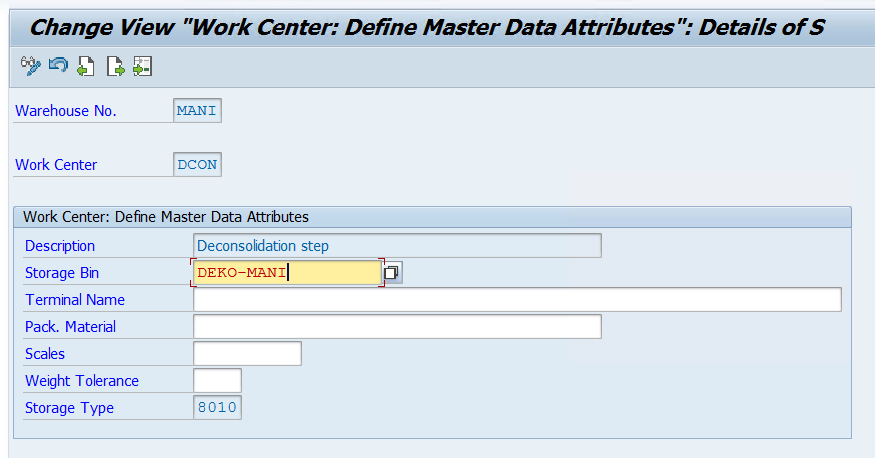
Once this is done, we need to assign a Bin to the work center where the activity will be performed once WT is confirmed and HU will be moved to this work center. Use tcode /SCWM/TWORKST
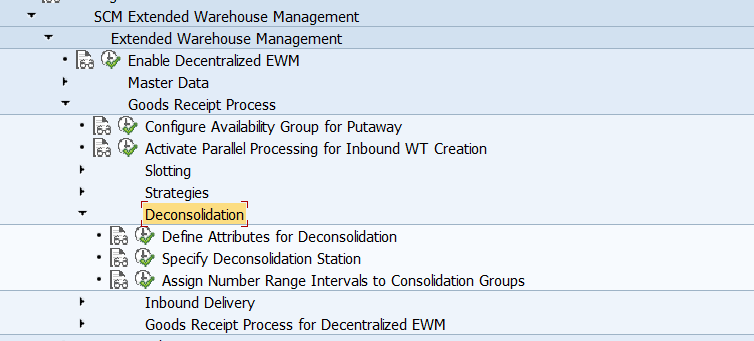
Part 5: Once work center-related information is maintained, we need to maintain some configuration specific to deconsolidation using the below path.
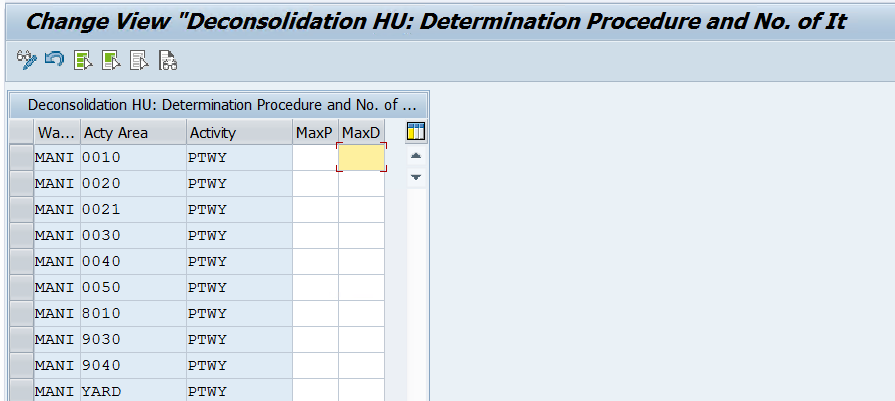
As you can see in the attributes we have not maintained max WTs in a Putaway HU and Max Items in a Decon HU for our storage types as we will allow any number of items and WTs during our POSC process.
Please note that max items in a Decon Hu should either be equal or more than the max WTs in a Putaway HU.
Now we need to maintain the decon station to our Warehouse and HU Type Group. Here we can maintain different work centers for different HU Type Groups if our warehouse is designed in such a way.

Now you will be able to de-consolidate your stock using POSC during Putaway.
To see the configuration in action, you may check this Blog.
Please feel free to reach out on LinkedIn if you have any queries or need help with your project.
