EWM CF134: Integrating EWM Staging Process for Production Planning | SAP EWM-PP Advanced Integration
Step 1: Create Material Master — 2 raw materials and 1 Finished Good
Step 2: Create BOM — CS01
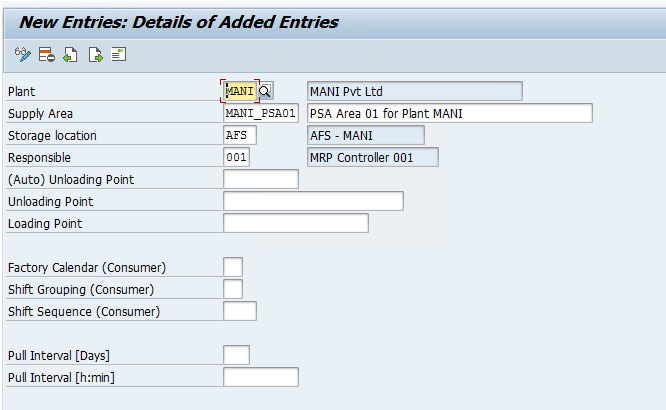
Step 3: Create PSA in S4 — PK05
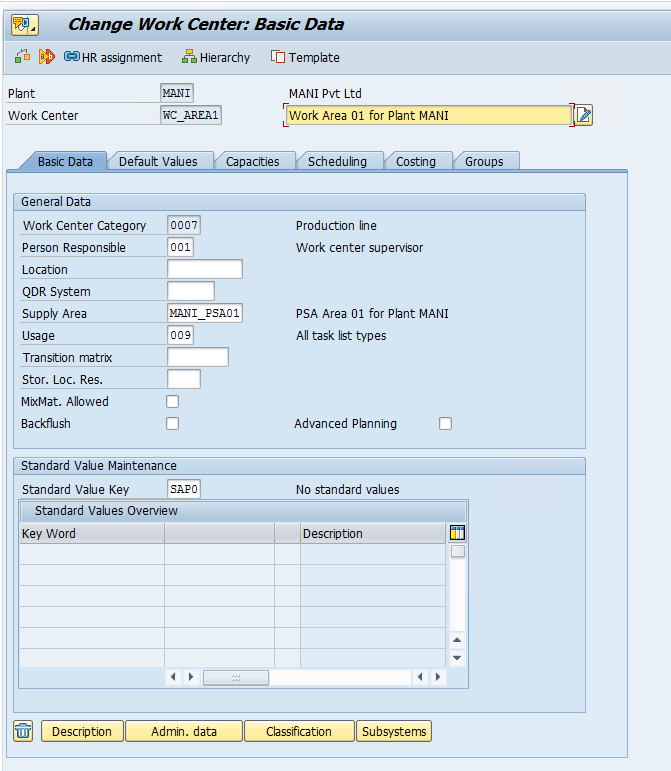
Step 4: Create Work center — CR01
Step 5: Create Routing for FG — CA01
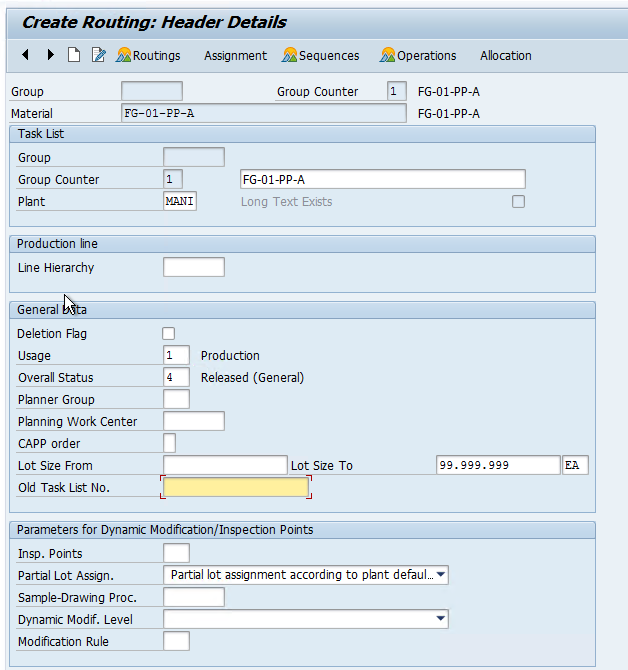

Once BOM and Routing are created, maintain the production version for the finished good in the material master data.
Step 6: Create Control Cycles for Components in S4 — LPk1
The staging indicator needs to be 5 which stands for EWM Staging and the Staging type will be selected in the EWM system.
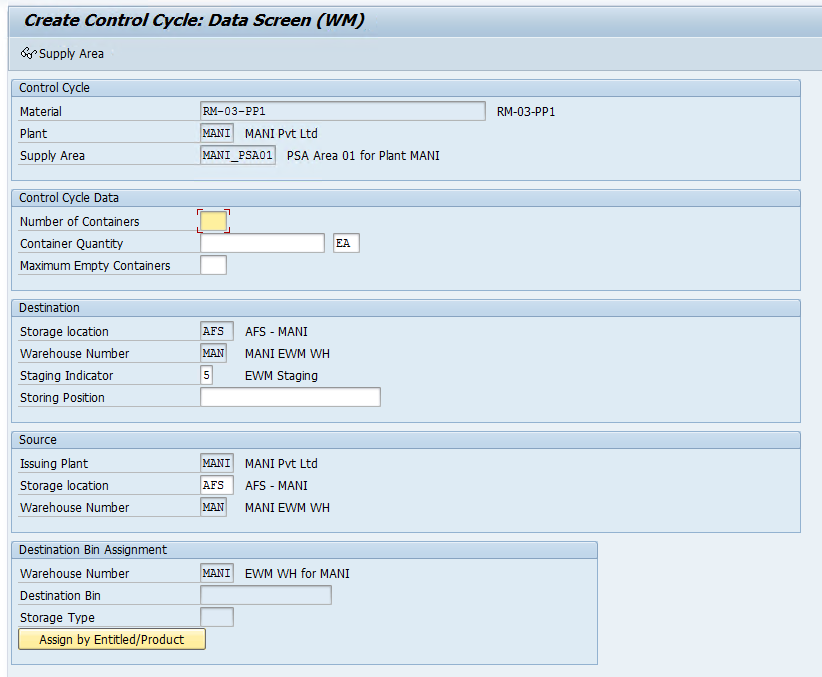
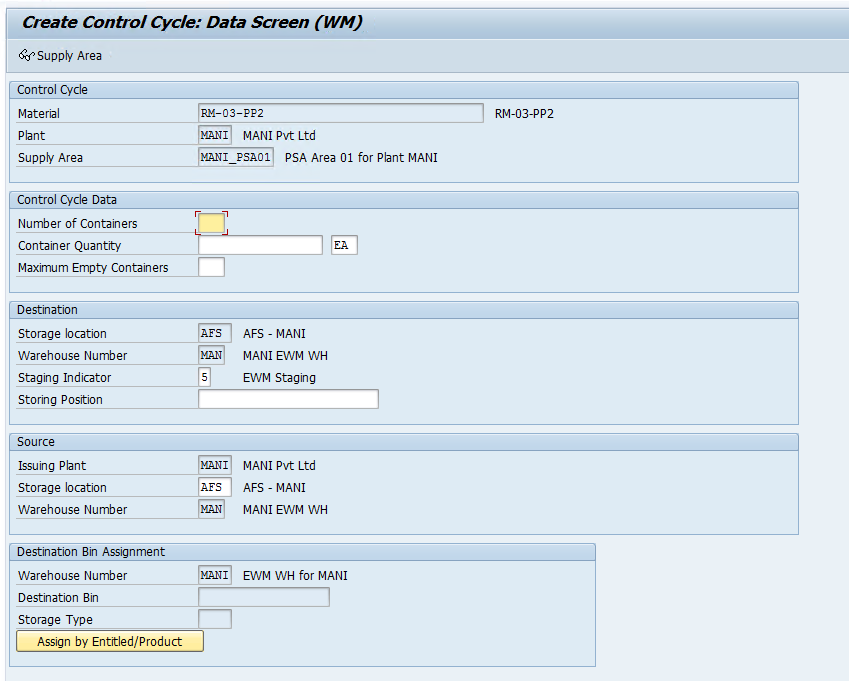
This is all we need to do from the S4/ERP side and now we will cover the configuration and master data needed in the EWM system to carry out the Staging for Production.
Step 7: Activate below BC Sets below by using SCPR20 Tcode first
/SCWM/PMR*

Step 8: Now we need to set up the PSA Area in EWM.
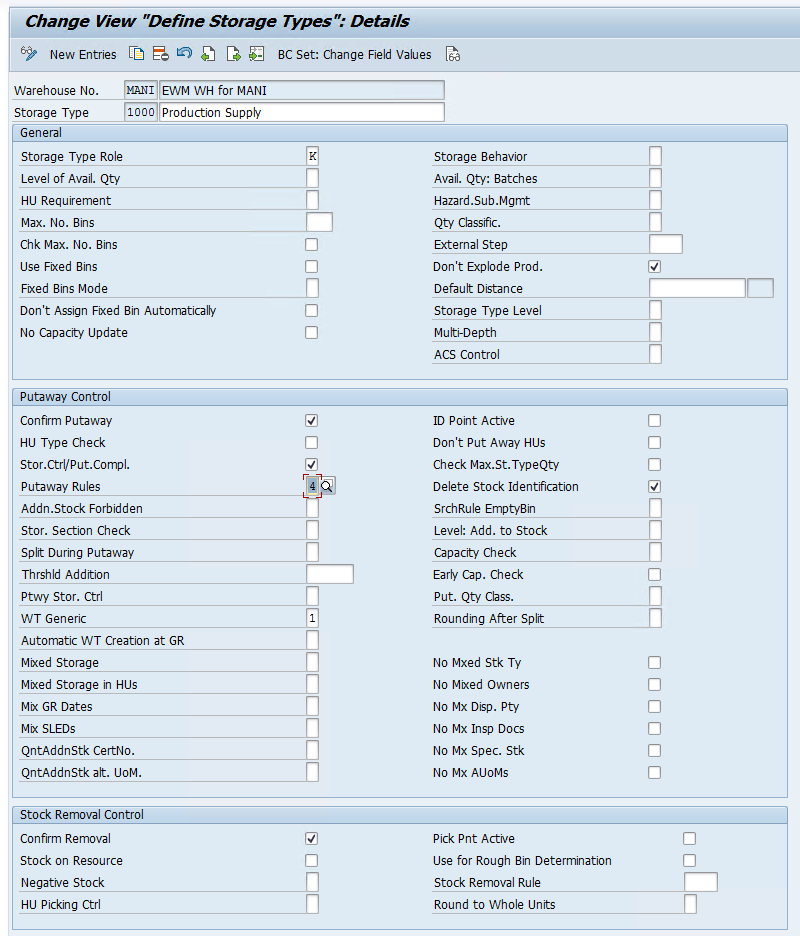
First, we will create a Storage Type (1000) which will used as a PSA Area. Here StrType Role K stands for Production Supply.

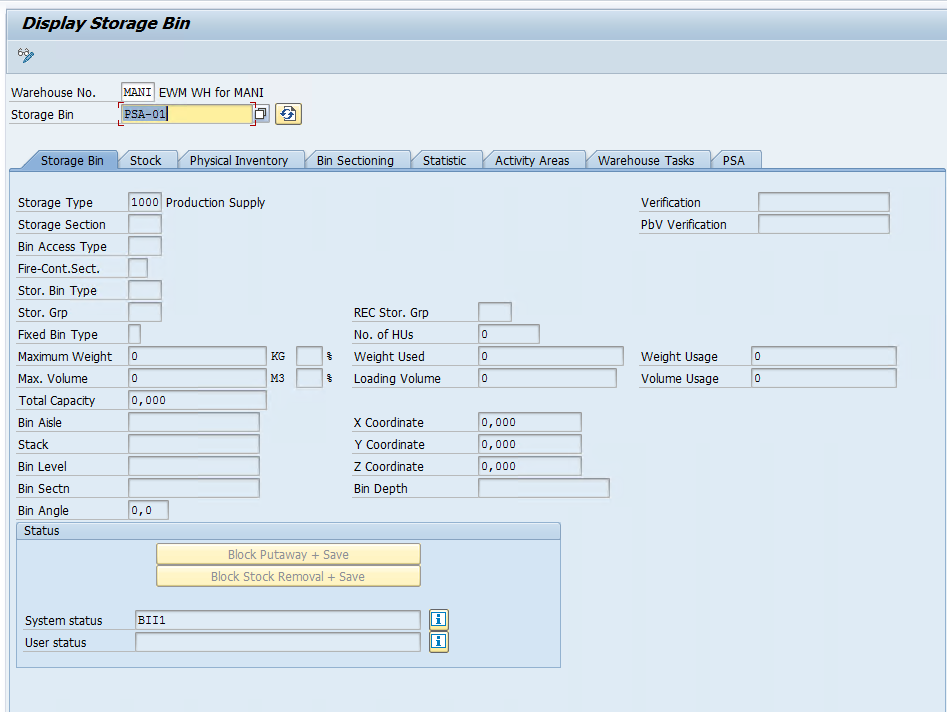
Now we need to create a Bin which will act as a physical area for Production Supply and all the components will be stagged in this bin.
Tcode: /SCWM/LS01
Step 9: Now we need to define the Document type for PMR which will get created in the EWM system once we trigger WM stagging from our production order.
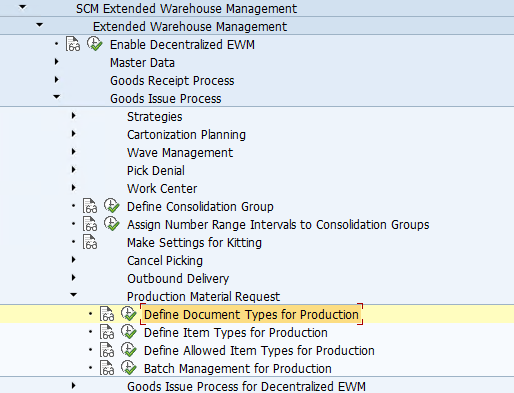
If we have activated the BC sets correctly, Doc type PMR and Doc Category PWR will be already available along with item types and allowed item types for production.
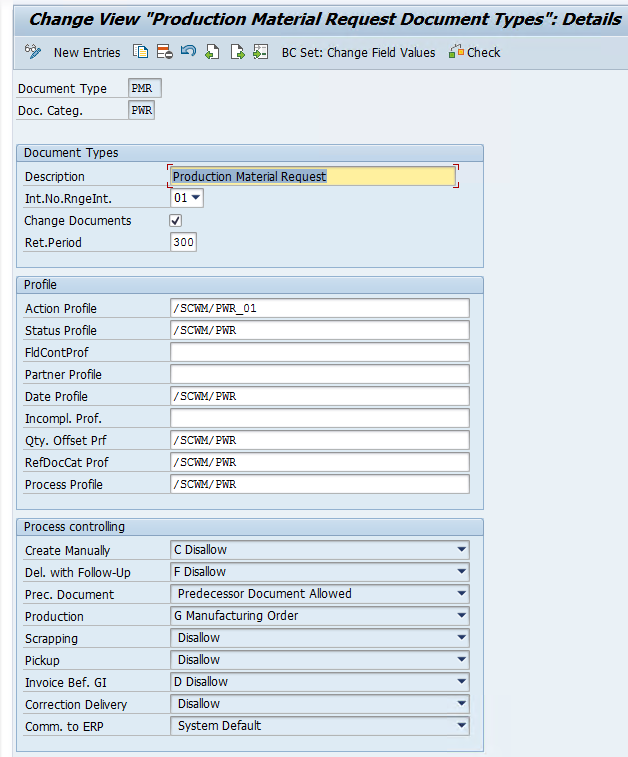

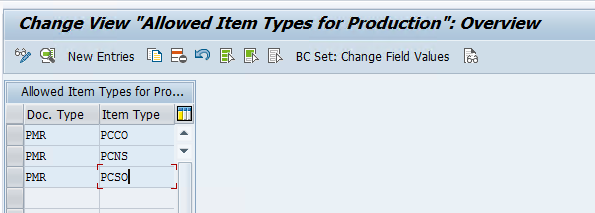
Step 10: Now we will map the ERP doc type with the EWM doc type to create PMR in the EWM system.
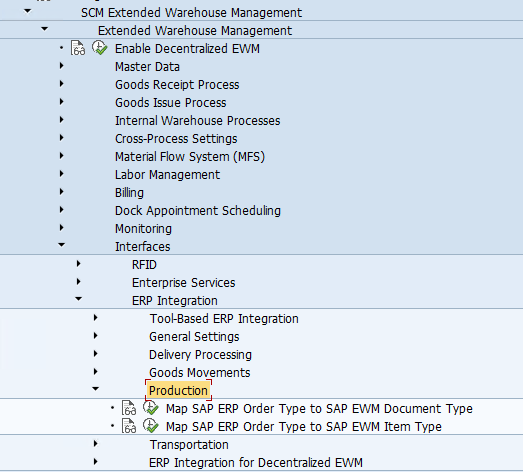

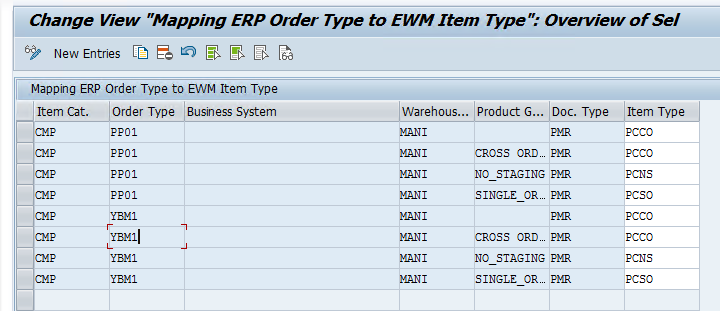
Step 11: Now we need to create a WPT to Stage the components and a WPT to Clear the PSA Bin in case stock is still left once the Production cycle is over.
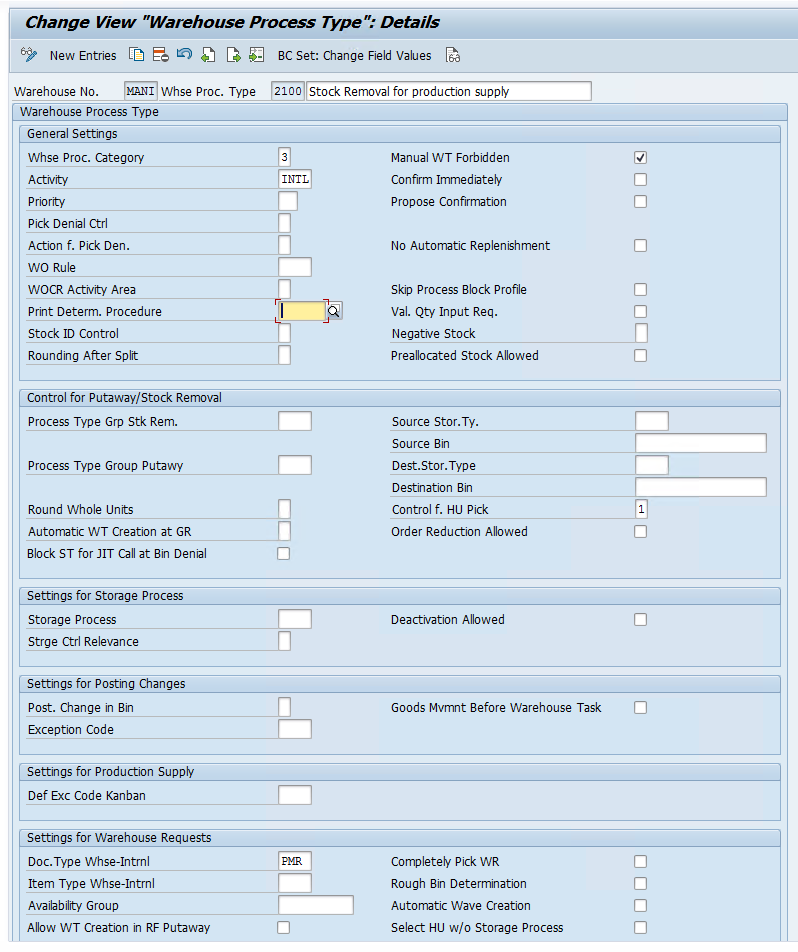
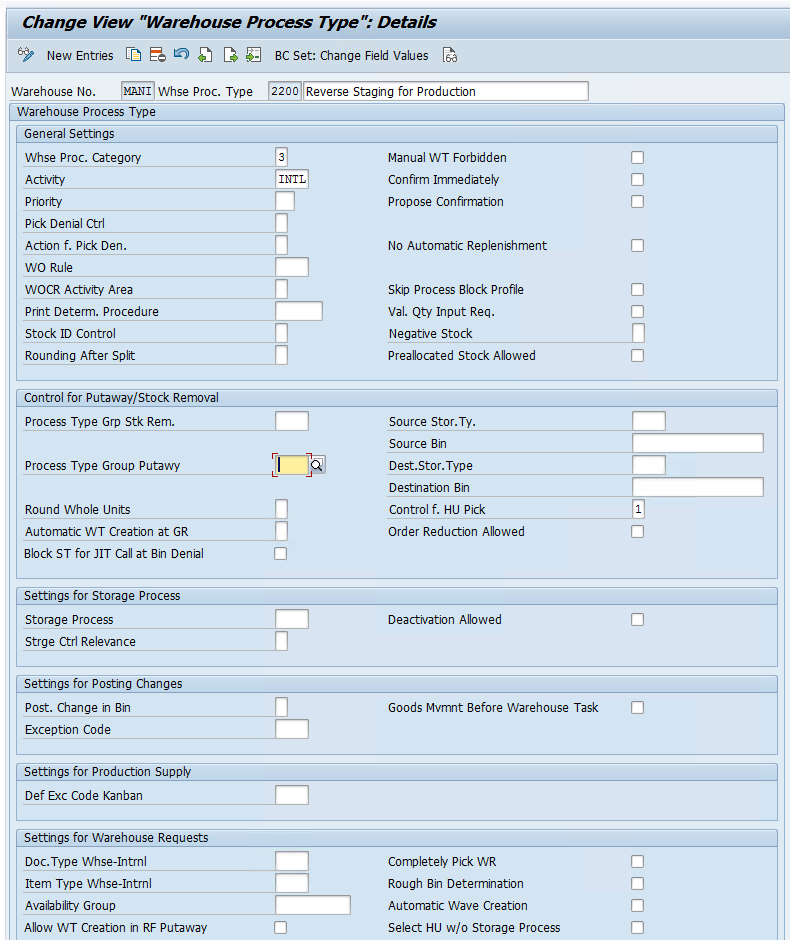
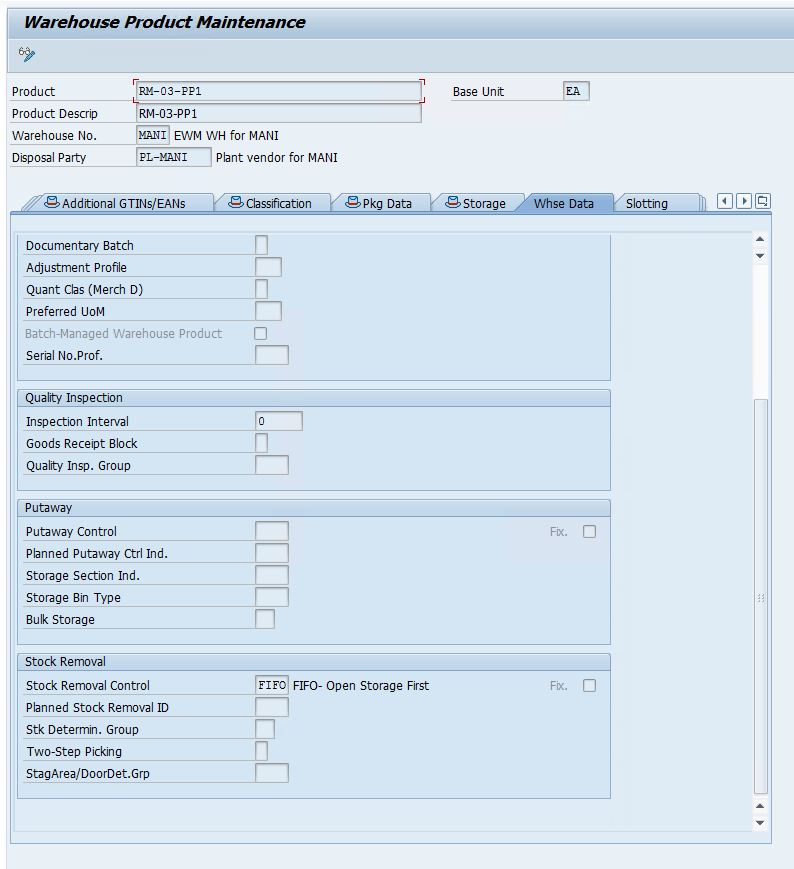
Step 12: Now we will set up WPT determination and Stock removal strategy for our product.

we already created picking strategy, we will just add the indicator in product master for our components.
Step 13: Create PSA in EWM — /n/scwm/psa_replicate
We can also create and assign the PSA bins in EWM with TCode /n/scwm/psamap


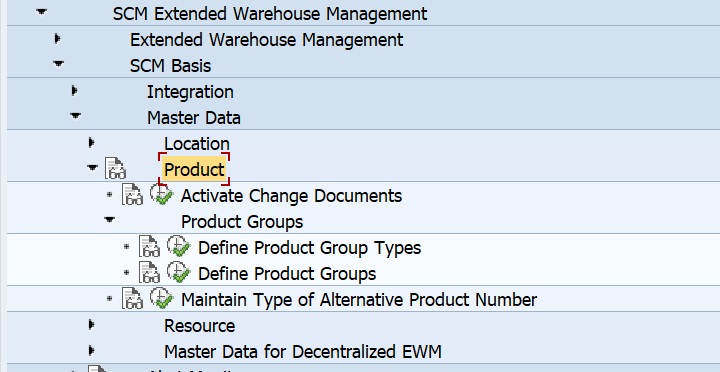
Step 14: Define product group and product group type

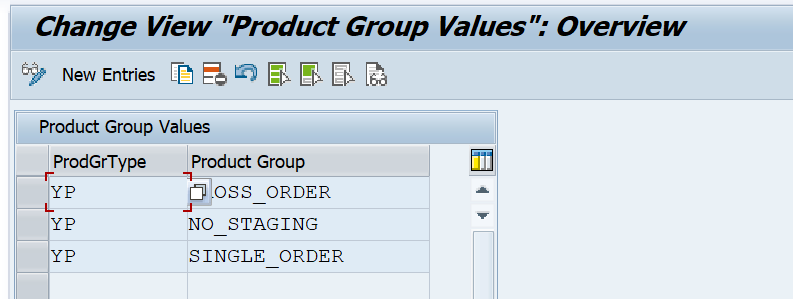
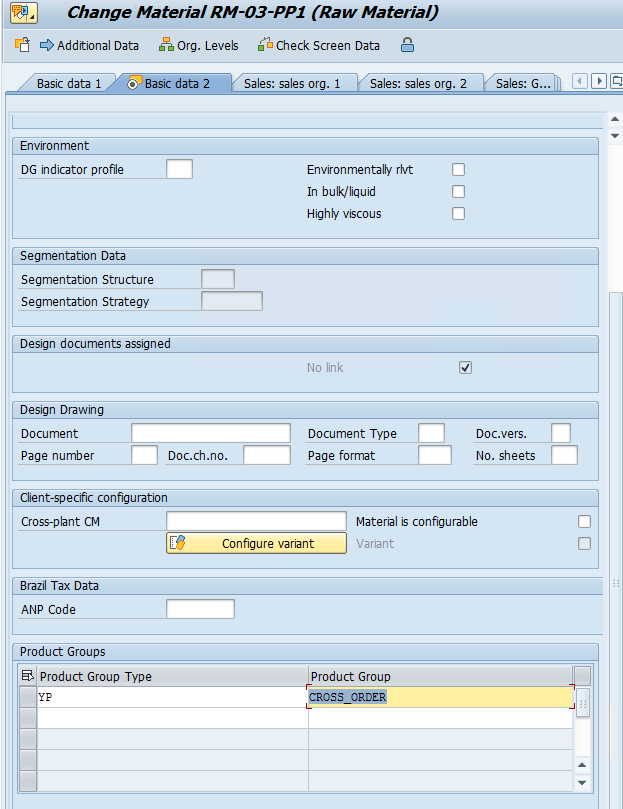
Step 15: Maintain Product group in material master in Basic data 2 View, we are only going to use the CrossOrder Staging method in this blog.
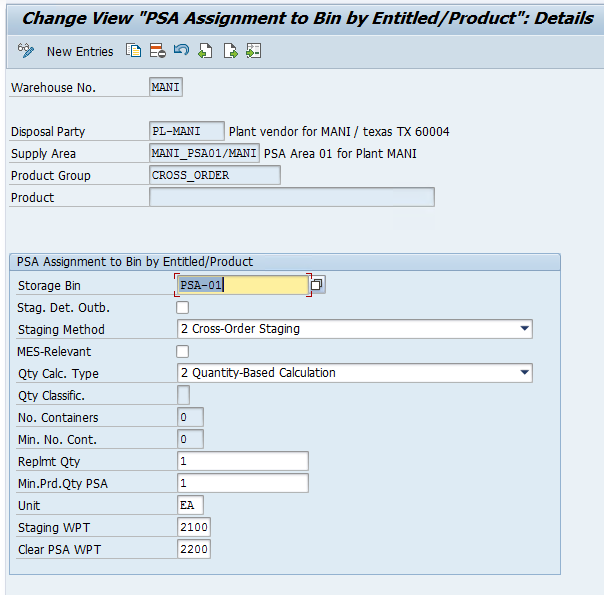
Step 16: Assign Bin to PSA/Product/Party entitled in EWM — /SCWM/PSASTAGE
We have maintained this for our product group, this can also be done for the each component individually.
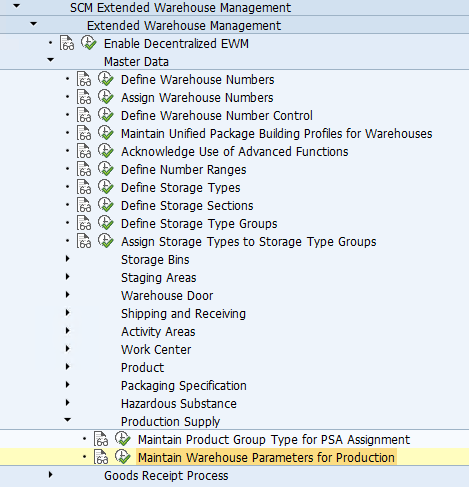
Step 17: MaintainProduct Group Type and Warehouse Parameters for Production


Now we will create a production Order in the S4 system and try to generate a PMR doc in the EWM system.
CO01
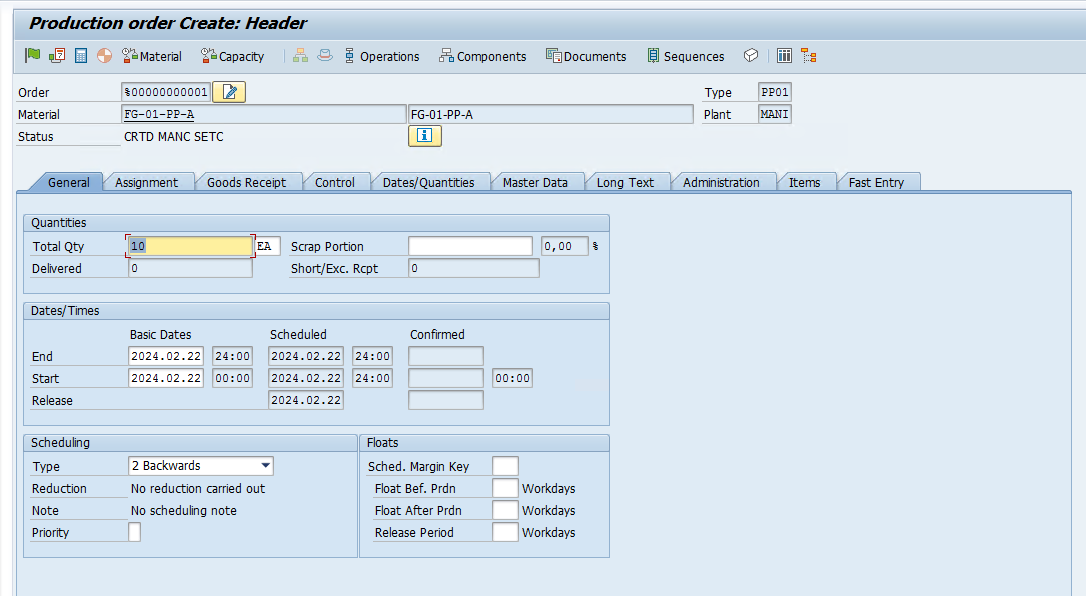
Release the ProdOrder : CO02
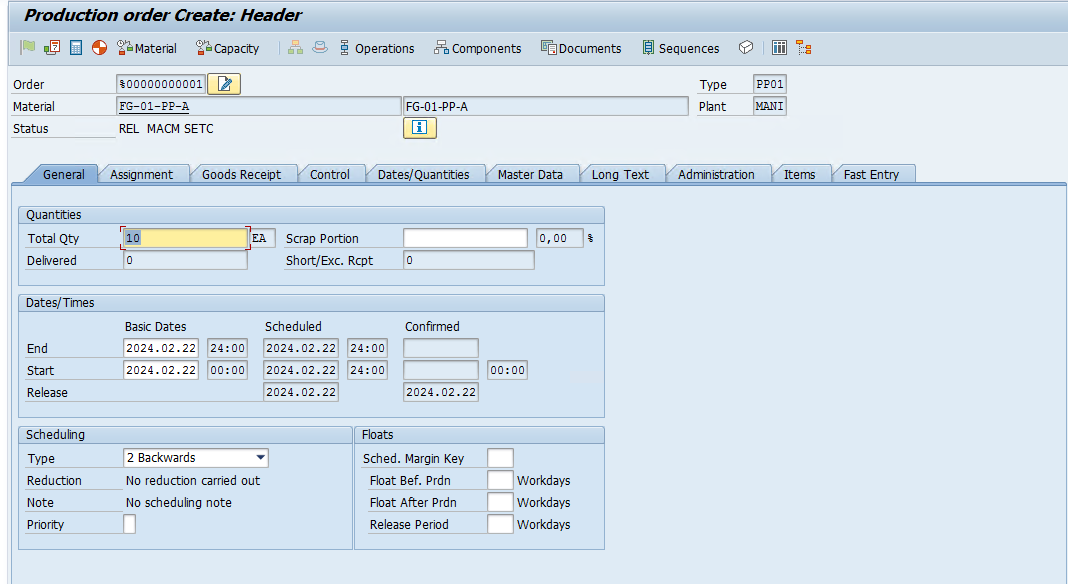
Carry out WM staging from change mode by clicking on execute button.


Save the ProdOrder and check Warehouse monitor for PMR

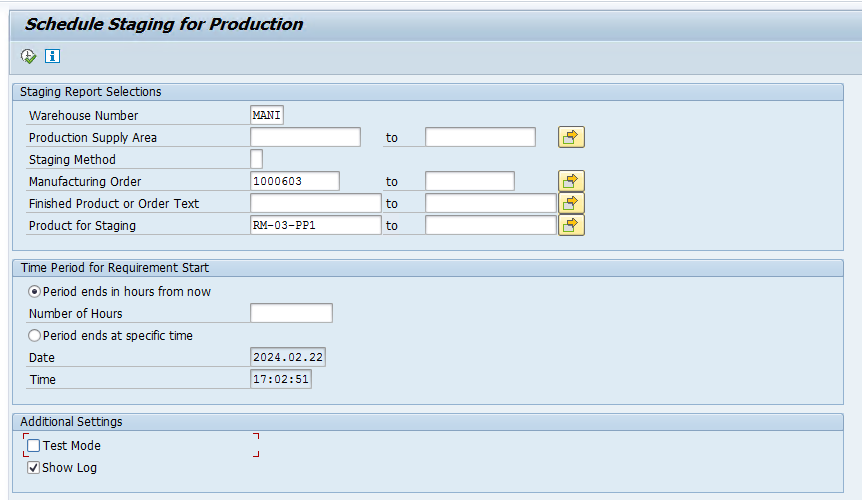
Now we can start with the staging process by using tcode /SCWM/STAGE
We can also use the below Fiori app and click on create Warehouse Task
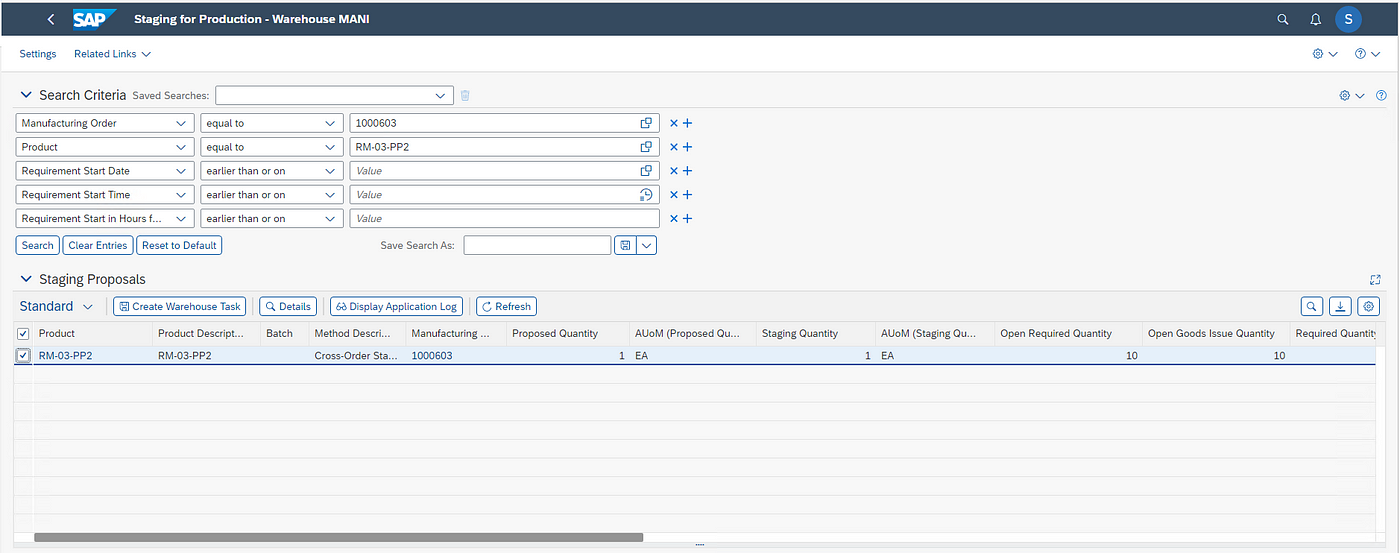
Now once this is done we will have the WTs created which we can check in the warehouse monitor, we will confirm the WTs to move the stock to the PSA Area.

Once this is done, we need to consume the components. We can use below Fiori app or RF Menu
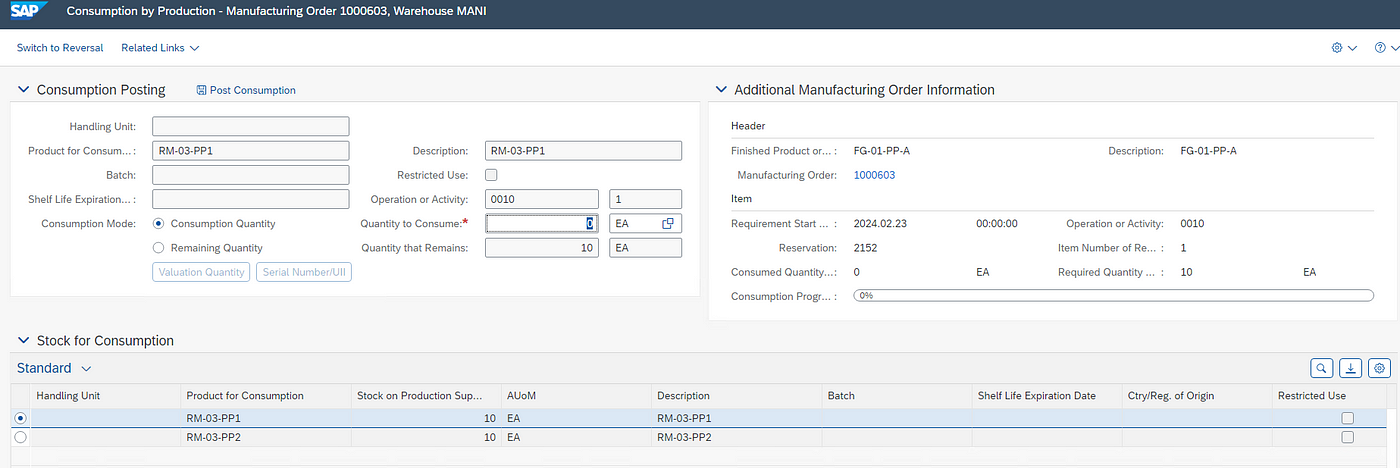

this will create a WT for GI. You can see this in the below Screenshot. First, the material was stagged and then material was consumed.

We can see in the PMR, GI is completed, and subsequently material docs with 261 mvmt type are posted in the S4 system.
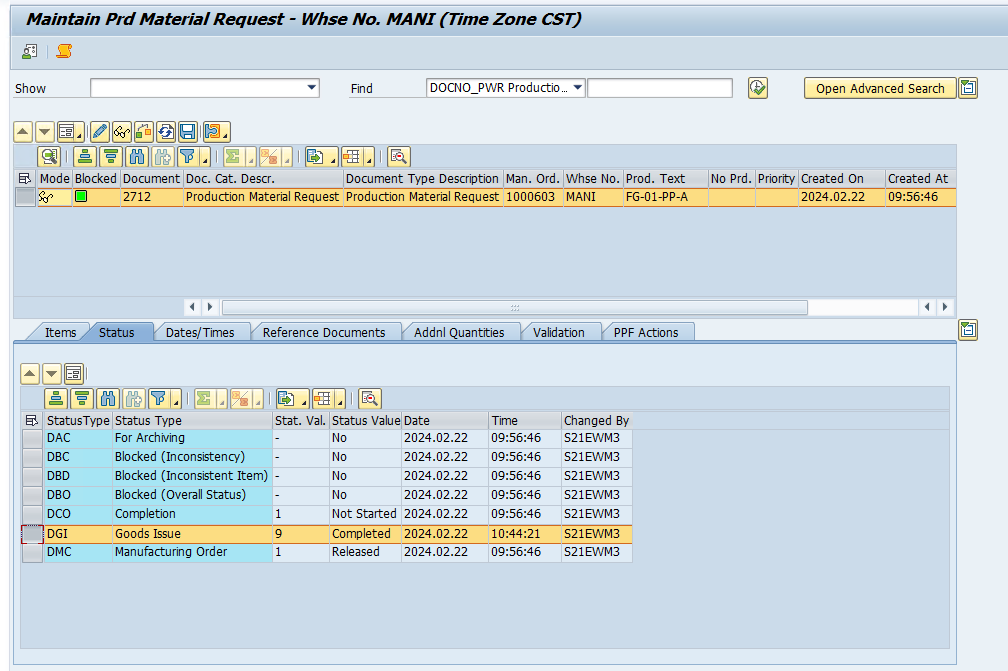
If we TECO the ProdOrder.
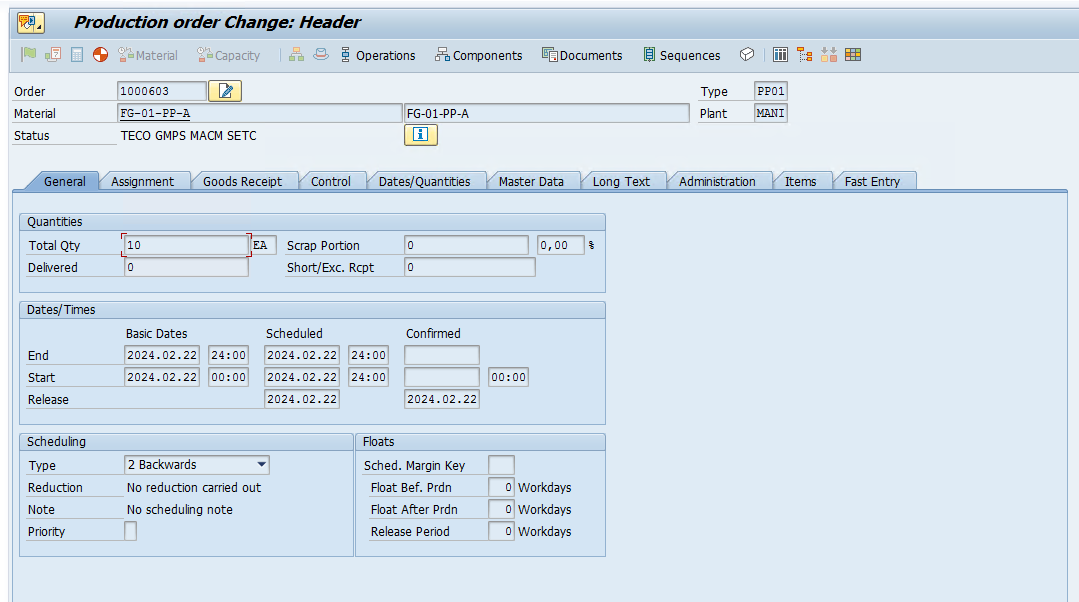
Prod Order status will change in PMR
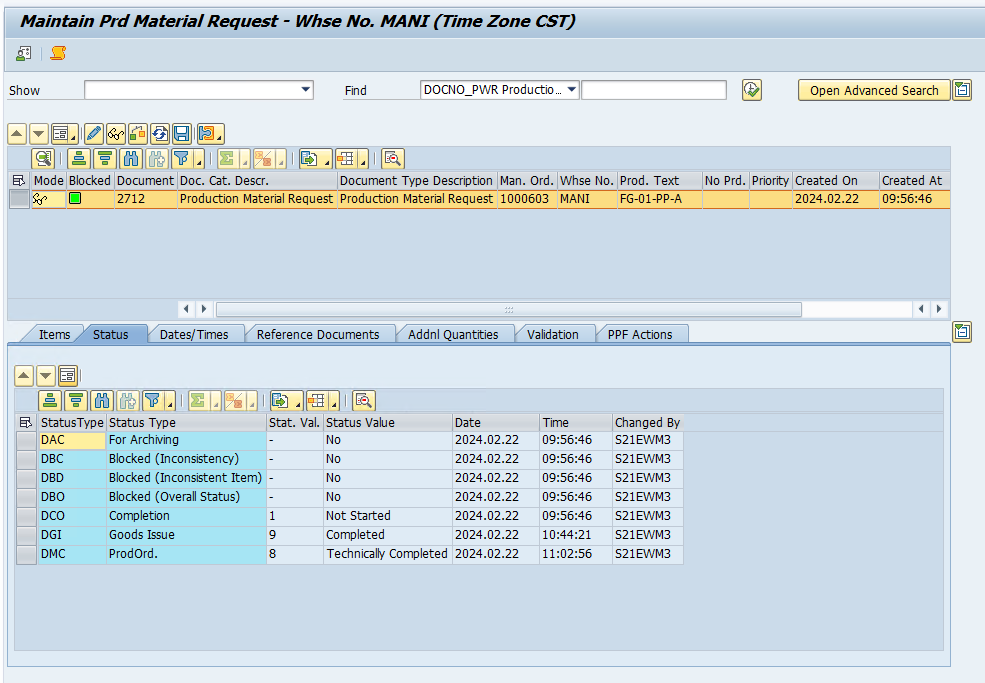
After posting GR for the Finished goods and final settlement. The Production order will be completed.

